



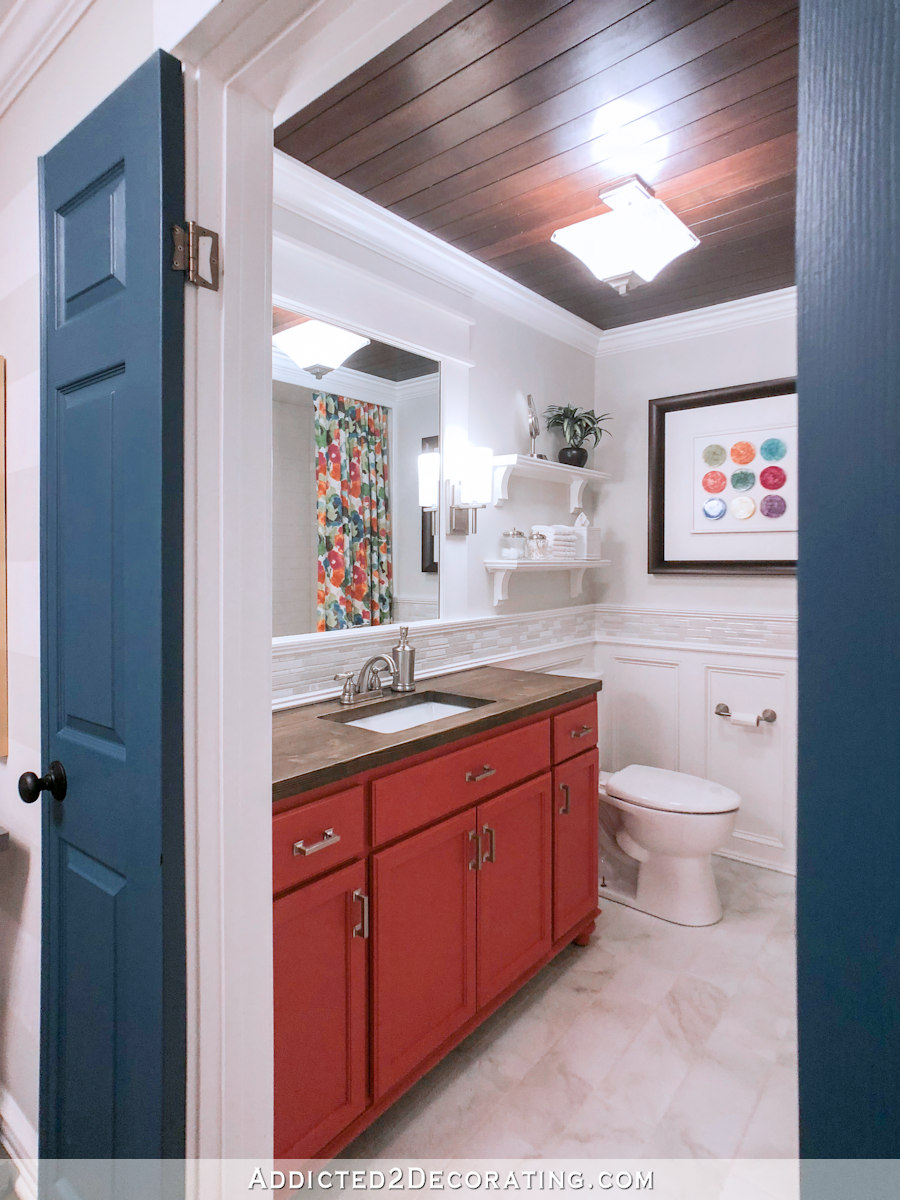
Due to the weather, my outdoor projects have to be put on hold for the time being. Yesterday I spent a few hours working on the outside bedroom door, but there had been more rain earlier in the day and the mud made the job much harder, slower and more dangerous. Safety tip: Never climb an aluminum ladder with muddy shoes. So with my outdoor projects on hold until the weather cleared and the ground dried out, I decided to revisit the hallway bathroom to closet project and see how far I can get in demolishing the bathroom.
If you’re new here, here’s a quick summary to get you up to speed. This is the bathroom I’m working on. It used to be our master guest bathroom, but then I did some remodeling and turned our three-bedroom house into a one-bedroom house, combining all three original bedrooms into one large master bedroom suite. That left this original guest bathroom in our bedroom suite, which is a very awkward layout to say the least. That’s why I’m turning this bathroom into a much-needed storage room.
On the left wall where the vanity and toilet were, there will be cabinets that look something like this…
And on the opposite wall, where the bathtub is now, there will be cabinets that look something like this…
I had already done some demolition work on this room a few months ago, but having just finished remodeling the rest of the bedroom, I decided that I wasn’t quite ready (mentally) to jump straight into another major interior remodeling project. So I closed the doors and went outside for a few months to work on some outdoor projects. But it looks like over the next few weeks I’ll be juggling this storage room project and outdoor projects while finishing up the last two outdoor projects that I want to complete when the weather permits. Once those are done, I will focus 100% on this storage space.
Anyway, I was a little shocked that it wasn’t at all difficult for me to rip out this bathroom, which was the second room renovation I’ve tackled after purchasing this house. Somehow I was expecting to feel some sort of sadness about leaving all my hard work behind, but it’s been a decade since I built this bathroom, so I feel nothing but excitement about the future storage space.
The most important thing I did yesterday was tear out that closet/shelving area that was just inside the bathroom door to the right.
All of that is gone now.
I was grateful that I was able to clean it all up with minimal damage to the drywall. I’m really trying my best to get this demolition done without having to start from scratch on all the drywall.
But that brings me to the first of the two big (and costly) lessons I’ve learned over the course of my years of room remodeling. Number one…
No construction adhesive is required for the cladding!
In my early years of DIY and remodeling spaces, I used construction adhesive very liberally. Every time I attached a piece of trim to the wall, I used construction adhesive before nailing the trim to the wall. I used it every single piece.
I stopped doing it a few years ago when I realized it just wasn’t necessary. When installing trim, installation is generally followed by sealing the trim and priming and painting the trim. Nails, caulk, primer, and paint are enough to hold the trim in place. Construction adhesive is almost always overkill. But I used to use it for everything.
Not only does it add unnecessary extra cost to the project, but if you decide to remove the molding, that construction adhesive will be nothing more than a nightmare and will destroy the drywall when you try to peel the molding off the wall.
Without the construction adhesive, all of the paneling could have been removed from the walls without damaging the walls. I would have simply had to score the caulk with a utility knife, peel the trim off the walls, do some sanding, and then the walls could have been painted (or textured and painted if you prefer wall texture). But I have a much bigger task ahead of me because of this construction adhesive.
The same applies to mirror mastic. I’m not saying that mirror mastic isn’t necessary in some situations. With this mirror, with this design that didn’t allow for mirror brackets screwed into the wall, it was definitely necessary. But just a dab of mirror mastic in each corner is enough. I can almost guarantee you that I have applied mirror mastic to the entire back of this mirror, which will make it a nightmare to remove and will likely leave you with completely destroyed drywall once removed.
I’ve learned a lot in my years of DIY, and one of my biggest lessons is that this kind of overkill will always come back to bite you. It is simply not needed and adds additional cost to a project.
And lesson number two…
Always install the flooring first (and buy extra to have on hand)
I know this isn’t always possible, but I wish I had installed the flooring all the way under the tub first and then installed the tub on top of the flooring.
If you don’t install the flooring first and don’t run it wall-to-wall across the room, but instead place the flooring around fixed objects in the room (like vanities, bathtubs, kitchen cabinets, etc.), there will always be problems when you decide to remodel and redecorate a room.
I’m left with this huge area with no flooring, so now I need to decide what I want to do with this floor. Since I can’t find a tile that matches this ten year old tile, do I fill it with a tile that’s “close enough”? Do I have to replace the entire floor? I could have saved myself a huge headache and additional expense if I hadn’t just laid the wall-to-wall tiles first before installing the tub and other fixtures. But I also learned that it’s always a good idea to have a few extra boxes of tiles on hand for this very reason.
But unfortunately I don’t have any tiles under the tub and no extra boxes of tiles. So now I have to figure out what I’m going to do with this flooring. I could have saved myself time and money if I had spent the extra bit of money back then, tiled the entire floor and bought a few extra boxes of tiles to keep on hand. But that’s the DIY life, right? We live and learn from our mistakes.